Showing posts with label dessert. Show all posts

10 February 2014

Chocolate Coffee Cookies


I love cookies. The chocolate chip cookie recipe I've posted in the past is a staple, and I try to bake them pretty frequently - my wife and all of our respective coworkers seem to appreciate it when I do. While chocolate chip is awesome, you can really make a more interesting dough than just a butter/flour/sugar mix. Case in point: I made cookies that do contain chocolate chips but also have two more of my favorite things in the dough itself: coffee and alcohol. Chocolate coffee cookies!

Chocolate Coffee Cookies

2 cups + 2 tbsp (9.6 oz) AP flour
1/4 cup cocoa powder
3 tbsp instant coffee powder
1/4 tsp sea salt + more for topping
1/2 tsp baking soda
1 cup brown sugar
1/2 cup granulated white sugar
1 stick (8 tbsp) unsalted butter
1 egg + 1 egg yolk
2 tsp vanilla extract
1/4 cup coffee liqueur (like Kahlúa)
1 cup chocolate chips (I used a mix of dark chocolate and white chocolate chips)

1. Melt the butter over low heat in a small pan (or in the microwave) and let cool for at least ten minutes.

2. Mix the flour, coffee powder, salt, baking soda, and cocoa in a bowl.

3. In a separate bowl, mix the butter and sugars until combined.

4. Add the coffee liqueur to the butter mixture and mix thoroughly.

5. Add the flour to the butter mixture gradually and completely incorporate.

6. Fold in the chocolate chips.

7. Wrap the dough in plastic and refrigerate for an hour.

8. About 20 minutes before removing the dough from the fridge, turn your oven to 325 degrees F.

9. Remove the dough from the fridge and shape into 1.5-inch balls.

10. Place the balls on a parchment paper-lined baking sheet, leaving about 2 inches between each ball, and sprinkle with sea salt.

11. Bake for about 12 minutes or until the edges are set (the center may not be completely set).

12. Remove from the oven and let cool slightly before moving to a cooling rack to cool completely.

24 February 2011

Crème Brûlée


I finally went and bought myself a blow torch. As far as I'm concerned, Crème Brûlée can only be made using a blow torch, not with a broiler or any other heat element. I'm sure it can be done and the results are fine, but there's something truly special about serving this dessert straight from the fridge, very cold, but with a perfectly crisp layer of melted sugar on top. The picture above was taken before I had finished caramelizing all the sugar; it should be darker and cover the whole surface, but the blow torch is tiny and the flame is small, so it took quite some time!

Crème Brûlée

2 cups heavy cream
8 egg yolks
1/2 cup sugar plus about 8 teaspoons more for the caramel glaze
1 tsp vanilla extract

Turn the oven to 325 degrees F. Heat the cream to almost a simmer over medium heat. In the meantime, stir the egg yolks and 1/2 cup sugar in a medium bowl until just blended. Slowly, gradually add the cream. Really, do this slowly - you're looking to make a custard, not scrambled eggs. Strain into a second bowl using a fine-mesh sieve. Add the vanilla and divide in 4 larger or 6 smaller ramekins.

Place a few layers of paper towels in a large, oven-proof glass dish. Place the ramekins on top of the paper towels, making sure they do not touch each other or the sides of the dish (or the bottom, but the paper towels should be taking care of that). Place in the oven and immediately pour scalding hot tap water into the dish (but not into the custard, obviously) until it comes about 2/3 up the side of the ramekins. Cook for about 35 minutes, or until quite set but still quivery in the middle. Remove from the oven and extract from the water bath. Let cool on a cooling rack until the custards are at room temperature. Cover with plastic wrap and refrigerate overnight or up to two days.

Just before serving, remove the ramekins from the fridge. Evenly sprinkle about 2 teaspoons of sugar over each ramekin of custard and apply heat. You're looking for a dark caramel crust that you have to crack open with a spoon in order to properly eat. As mentioned before, a blowtorch would be ideal for this, but in a bind, you can use your broiler set to high. This will probably heat the custard as well, and the end result won't be as tasty, nor will it be prepared traditionally.

25 January 2011

Red Berry Cobbler

This is a variation of a recipe I found in New American Table, a cookbook by a chef born in Ethiopia, raised in Sweden, and living in New York City. The flavors are much more complex than a standard cobbler, thanks to the red wine, cardamom, and honey. You can prepare these until they're ready to go in the oven, then refrigerate for up to three days. Perfect, in other words, to make in advance for that big dinner party!

Red Berry Cobbler

2 cups AP flour
3 tbsp white sugar
3/4 cup light brown sugar
1/2 tsp baking powder
1/2 tsp baking soda
1/2 tsp salt
1/2 tsp ground cardamom
1/2 tsp ground cinnamon
6 tbsp unsalted butter (cold)
1 cup milk or buttermilk
1 vanilla bean or 1 tsp vanilla extract
1/2 cup honey, preferably raw
zest of 1 lemon
2 tbsp cornstarch
3/4 cup dry red wine
2 cups fresh raspberries
3 cups fresh strawberries
confectioners' sugar for dusting

Start by heating the oven to 400 degrees F. In a large bowl, stir together the flour, white sugar, baking powder, baking soda, salt, cinnamon, cardamom, and 1/4 cup of the brown sugar. Cut the butter into small pieces and add to the flour mixture. Mix with your fingers until a mealy mixture is formed. Add the milk and stir with a spoon until a very wet dough is formed.

Cover a cookie sheet with a parchment paper. Divide the dough into 10 2-inch wide biscuits. Bake in the oven until golden brown, about 15 minutes.

In the meantime, prepare the filling. Hull the strawberries and cut them into quarters. In a small bowl, mix the honey, lemon zest, cornstarch, and the seeds of the vanilla bean or the vanilla extract, depending on which you're using. In a medium saucepan, bring the red wine to a boil. Reduce to a simmer, then add the honey mixture and stir continuously until it thickens slightly. Stir in the fruit and the remaining 1/2 cup brown sugar and cook until the sugar dissolves. Remove from the heat.

Butter either twelve 4-ounce or six 8-ounce ramekins. Crumble up the biscuits and divide half of them into the ramekins. Add equal amounts of the berry filling on top of the biscuits, then crumble the remaining biscuits on top. Cook in the (still 400 degree) oven for about 15 minutes, or until bubbling. Be careful not to let the biscuits on top burn - if they start to brown too quickly, cover with some aluminum foil.

Let cool for 5 minutes, then dust the top with confectioners' sugar and serve, preferably with ice cream.

30 November 2010

Holiday Cocktail: Jolly Arrival

It's the holiday season! Our Christmas tree is up, the fireplace is lit almost every night, and I get to indulge in cooking with those ingredients that are really only useful for about a month's time around the end of the year.

I came up with a drink that fits well with the holiday theme, and decided to name it Jolly Arrival (figure THAT one out). The only problem is that you can only really have one - it's almost like a dessert!

Jolly Arrival

1 oz vodka
0.5 oz Irish cream liqueur (Bailey's or similar)
0.5 oz coffee liqueur (Kahlúa or similar)
0.5 oz almond liqueur (Amaretto or similar)
0.5 oz hazelnut liqueur
0.5 oz peppermint liqueur
3 oz whole milk or heavy cream
freshly grated nutmeg
cocoa powder

Fill a cocktail glass with ice and set aside. Add ice to a cocktail shaker, and pour in all the ingredients. Shake for 5 seconds. Discard the ice in the cocktail glass and strain the contents of the shaker into the glass. Sprinkle cocoa powder and nutmeg on top. Serve immediately.

30 May 2010

Regional Dinner Party: Spain


I've been meaning to have people over for dinner now and then, cooking a multi-course dinner from a specific region or country, and we finally had our inaugural event the other day. The first country to appear on the menu was Spain, and this was my first time cooking Spanish food other than some random odds and ends. The full menu consisted of:

  • Spanish cheeses with Pan de Horno
  • Cauliflower with cherry tomatoes and Serrano ham
  • Paella de marisco (seafood paella)
  • Bizcochos Borrachos (drunken sponge cake)
  • Licor 43 con leche
The dinner was certainly a success. I just wish I had taken pictures of everything!

Pan de Horno

1 tbsp instant yeast
3 cups warm water
7 cups unbleached all purpose flour
2 tsp salt
1/4 cup olive oil

Mix the yeast and water in a small bowl and let sit for ten minutes. Sift the flour and salt together into a large bowl. Using your fingers, mix in the oil with the flour mixture. Pour the yeast mixture into the flour mixture and stir with your fingers until the dough is firm and slightly sticky. Pour the dough onto a lightly-floured work surface and knead another two or three minutes.

Grease a bowl with olive oil and place the dough in it. Cover the bowl with a towel and leave until doubled in volume, about an hour. Once the hour is over, punch the dough down and move to a floured work surface. Knead a few seconds, then return the dough to the bowl and cover for another 15 minutes.

Cut the dough into two pieces, then form loaves. Place on a greased pan and cut slits on top of the bread. Turn the oven to 450 degrees F. Cover and let raise for 30 minutes, then bake in the oven for around 30 minutes or until the top is toasted and the loaves sound hollow when knocked on the bottom. Remove to a cooling rack and leave until completely cooled.

Cauliflower with Cherry Tomatoes and Serrano Ham
1 large head cauliflower
1/2 red onion
1/3 cup olive oil
1 cup cherry tomatoes
1/4 lb thinly-sliced Serrano ham
1 1/2 tbsp fresh lemon juice
1/4 cup finely-chopped fresh flat-leaf parsley
Start by cutting the cauliflower into 1-inch florets. Boil salted water in a large pot, then add the cauliflower florets and cook for 5 minutes or until tender. Drain in a colander and set aside. Next, cut the ham into 1-inch pieces and cut the tomatoes in half.

While the cauliflower cooks, fry the onion with the olive oil in a large frying pan over medium heat. Once the onion has turned translucent (about three minutes), add the tomatoes and ham. Cook until just heated, about two minutes. Remove from the heat and add the lemon juice and parsley. Combine with the cauliflower and serve warm or at room temperature.

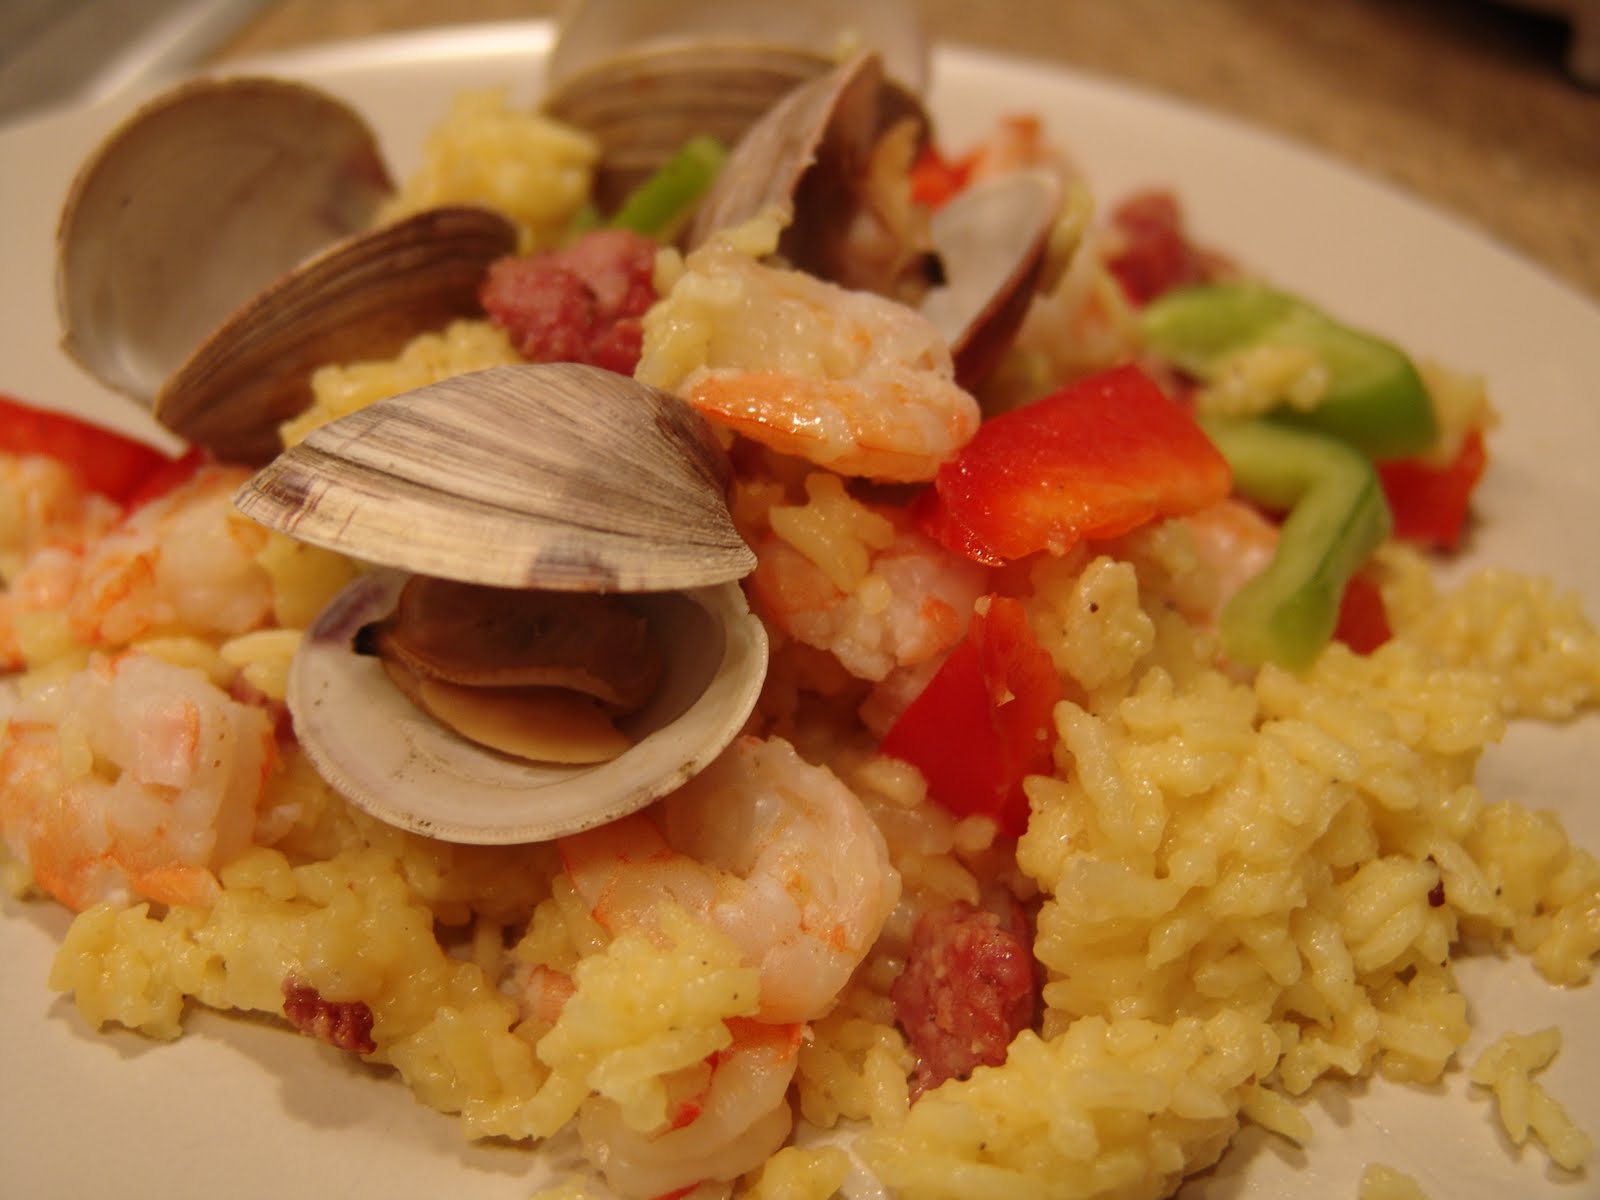
Paella de marisco
1 lb chorizo
1 lb shrimp
15 clams
15 mussels
1/2 cup white wine
1 large yellow onion
5 cloves of garlic
2 cups medium grain white rice
4 cups chicken stock
4 cups water
2 red peppers
1 green pepper
1 tsp saffron threads
1/4 cup olive oil
salt
pepper

I, unfortunately, do not have a paella pan or a pan large enough to cook a paella, so I have to resort to the oven method, which works quite well.
Start by peeling the shrimp, reserving the shells. Put the shells and four cups of water in a large pot over medium heat. Simmer for about 20 minutes, or until reduced to 2 cups. Pour through a fine mesh, reserving the liquid and discarding the shells. Set the newly-created shrimp stock aside.

Boil water in a large pot and add the shrimp. Cook for 2-3 minutes or until just cooked through. Drain and set aside. Crumble the chorizo and cook over medium heat in a large skillet. Set aside.
Clean the mussels and clams, discarding any that do not close when tapped. Add the wine to a large pot and bring to a simmer over medium heat. Add the mussels and clams, then cover. Cook for 3 to 4 minutes or until the shellfish are open, shaking the pot occassionally. Remove any mussels or clams that did not open completely, then set aside.

Turn the oven to 375 degrees F. Heat the oil in a large skillet over medium heat, then add the onion (chopped) and garlic (minced) and cook for about five minutes. Add the rice, shrimp stock, 3 cups of chicken stock, saffron, about 1 teaspoon of salt and 1 teaspoon of pepper and cover. Simmer for about 15 minutes or until the rice is al dente and some liquid remains. Transfer to an oven-safe dish, add the shrimp, chorizo, mussels and clams and cover with tin foil. Bake for 30 minutes and serve immediately.

Bizcochos Borrachos

4 eggs
1/2 cup granulated sugar
3/4 cup flour
1 tsp baking powder
1/3 cup granulated sugar
8 oz water
1.5 tbsp honey
1 1/2 oz rum
1 cinnamon stick
peel from 1/2 lemon

Turn the oven to 350 degrees F. Grease an 8-inch cake pan with vegetable shortening and flour it (add flour, shake until coated, turn upside-down to remove excess).

Separate the egg yolks from egg whites. Beat the yolks with the sugar in a medium bowl until creamy. Using a stand mixer (or electric mixer), beat the egg whites until forming soft peaks. Carefully fold the yolk mixture into the egg whites. Next, fold in the flour and baking powder. Pour the batter into the cake form and bake in the center of the oven for 20 minutes or until a toothpick inserted into the center of the cake comes out clean. Let the cake cool completely before serving.

To make the sauce, add the sugar and water to a large sauce pan and place over medium heat. Add the cinnamon stick, honey and lemon peel and let simmer for about 2 minutes, stirring occassionally. Remove from the heat, add the rum and let cool to room temperature.

Cut the cake into 9 pieces and serve each piece with a drizzle of the syrup.

Licor 43 con leche

Licor 43
milk
Licor 43 is a liqueur from Cartagena, Spain, made from citrus fruits, vanilla and a variety of other herbs and spices - 43 in total (hence the name). I served this with warm milk, as I've been told that's the way they do it in Spain. The liqueur itself also works well on its own or on the rocks.

18 March 2010

Lemon & Almond Biscotti


Ignoring the fact that I'm posting about something sweet twice in a row (man, those muffins were good), I really love biscotti and made some tonight, so I thought I might as well update the blog as well. Biscotti, or "biscuits" in Italian (it apparently also means "twice baked"), is a wonderful hard cookie/biscuit/cracker that goes great with a cup of strong espresso or even a glass of wine. You bake a sort of loaf of the "bread" first, then divide it into smaller pieces and bake those for some additional time to create the actual cookies. This recipe includes nuts, lemon zest, and a white chocolate shell. Heavenly - and simple to make.

The current leader in the most recent poll is Italian food, so here you go!

Lemon & Almond Biscotti


2 cups unbleached AP flour
3/4 cup cornmeal
1 1/2 tsp baking powder
1 tsp salt
1 cup granulated sugar
3 eggs
zest of 3 medium lemons
3/4 cup almonds, blanched or roasted
12 oz white chocolate chips

Turn the oven to 350 degrees F. Line a baking sheet with parchment paper or a silicone baking mat.

Mix together the flour, cornmeal, baking powder and salt in a large bowl. In a different large bowl, or the bowl of a stand mixer, beat the sugar and eggs until very pale, about 2 minutes. Grate in the lemon zest and slowly add the flour mixture while beating. Stir in the almonds and let rest for at least 5 minutes.

Divide the dough in half and make two 3x9 inch "loaves" on the baking sheet. If too sticky, use wet hands. Make sure the dough has a little room to grow; don't place the loaves too close together. Bake in the middle of the oven for 30 minutes.

Once finished, remove from the oven and let cool for about 10 minutes. Next, using a serrated knife, cut the loaves into roughly 1-inch-thick slices and return to the baking sheet, cut side up. Bake an additional 25 minutes, or until golden.

Let the biscotti cool completely. Create a double boiler by barely simmering water in a pot and placing a heatproof (metal or glass) bowl over the pot - just make sure the bowl does not touch the water. Add the chocolate chips and stir until completely melted. Remove from the heat, and dip one end of each biscotti in the chocolate. Place on a cooling rack until chocolate has hardened.

These cookies will last you at least a week in an airtight container.

09 December 2009

Peppermint Bark

All right, time for a break from the Swedish candy. Let's make some American candy! Peppermint bark is pretty awesome, and making it yourself is easy and way cheaper than buying the pre-made stuff sold by various companies.

Peppermint Bark

1 lb white chocolate chips
7 oz candy canes

That's it, ingredients-wise. You can add peppermint extract if you want a stronger peppermint flavor, but there's really no need to.

First, crush the candy canes. You can put them all in a strong plastic bag, fold the bag so no cane will escape alive, then pound the bag with a hammer or meat tenderizer (flat side, there's no need to tear huge holes in the bag) or you can use a food processor like I did. I crushed the canes a little too finely, but it turned out (very) well anyway.

Next, line a cookie sheet with parchment paper. You're most likely not going to go all the way to the edge, so there's no real reason to cover all the sides of the sheet.

Next, start up a double boiler: pour an inch of cold water into a medium pot. Place a metal bowl that fits over the pot (make sure the water does not touch the bowl). Bring the water to barely a simmer - I put it on 3 on a scale of 1-10 and it got a little too hot after a while, so I had to lower it to a 2. Place the chocolate chips in the bowl and stir with a spoon or spatula until completely melted.

Take the bowl off the heat, then add the crushed candy canes. Stir to combine, then pour the mixture onto the center of the parchment paper, using a plastic spatula. Spread until about 1/3 inch thick. Leave to cool for about 15 minutes, then put in the fridge until completely firm (about 1 hour). Break up using your best tool (that would be your hands), then store in a glass, metal or plastic container for up to two months (if this lasts two months, your self control should be in the Guinness Book of World Records).

12 October 2009

Apple & Raspberry Crumble

There's a saying where I come from: a good crumble is better than two...in...th...uh...actually, I don't know of any sayings that involve crumbles, but they're really awesome so I decided to make one and post the recipe here. You can obviously try various fruit combinations, but this one is pretty fantastic.

Apple & Raspberry Crumble

1 stick + 1 tbsp unsalted, chilled butter (9 tbsp)
1.25 cups all purpose flour
0.75 cups granulated sugar, divided
2 medium apples (I like Gala, but pretty much any apple will be fine)
12 oz raspberries (about 1.5 cups)
ground cinnamon
salt

Turn your oven to 425 degrees F. Next, peel and core the apples. Cut them into small chunks, about half an inch. Wash the raspberries. Place the fruit in a 9 inch tart pan (preferably made of glass, but metal will work as well). Sprinkle about 1/4 cup sugar over the fruit.

In a bowl, stir together the flour, sugar, a small pinch of salt and about half a teaspoon of cinnamon. Next, cut the butter into the flour in chunks. Now, it's time to get dirty: mix the flour mixture with the butter with your fingertips. You're looking to divide the butter enough that there are no large chunks left, but you're not looking to form a uniform dough, like you would when making a pie or quiche.

Sprinkle the mixture over the fruit, making sure to cover as evenly as possible. Bake in the middle of the oven for about 20-25 minutes, or until the fruit is bubbling and the crust is golden. Serve warm or at room temperature with vanilla ice cream.

This will keep, covered, for about 4 days if left in room temperature and about a week in the fridge. If you keep it in the fridge, I suggest reheating it in the microwave for half a minute on high before eating.

19 March 2009

Pi(e) Day


Nerd alert! Last Saturday was 3.14.09 - 3.14 is, as I hope you all know, also known as Pi Day. Jacquie and I had some people over, made some pies and watched the movie Pi. I made an apple pie (Alton Brown's recipe), a mixed berries pie and a quiche with broccoli, chicken and fontina cheese. All three came out splendidly (the quiche went in two minutes, the apple pie was almost finished, then everyone was too full) and good times were to be had.

For the mixed berry pie and the quiche, I decided to just use a pre-made crust. For the apple pie, things got slightly more advanced.

Alton Brown's Apple Pie

For the crust:

6 oz unsalted butter
2 oz vegetable shortening
5 to 7 tbsp apple jack (or apple brandy)
12 oz all purpose flour
1 tsp table salt
1 tbsp granulated sugar

For the filling:

3 lb apples, a mix of Granny Smith, Honeycrisp, Breaburn, Golden Delicious or whatever else you can find - try to mix them up (tart, sweet, different textures)
3 tbsp tapioca flour
2 tbsp apple jelly
1 tbsp apple cider
2 tsp freshly squeezed lime juice (the juice of 1/2 lime, more or less)
1/4 tsp kosher salt
1/4 tsp ground grains of paradise

Start with the dough for the crust. Bring out your favorite food processor and combine flour, salt and sugar. Pulse a few times. Add the butter and pulse 3-4 times, until combined. Add the shortening and pulse 3-4 times again, until the mix looks mealy and everything is incorporated. Now add 5 tablespoons of apple jack and pulse another 5 times. Add more apple jack if needed, until dough holds together when squeezed. Weigh the dough, remove half and shape into a disc, cover with plastic wrap and place in the fridge. Repeat with the other half of dough. You want to leave this at the very least for 1 hour, or up to overnight.

Next, let's do the filling. Peel and core the apples. Slice into 1/2 inch wedges - about 8-12 wedges per apple, depending on size. Toss with 1/4 cup sugar and place in a colander set over a bowl. Let drain for 1 1/2 hours. Once drained, move the liquid to a saucepan and place over medium heat until reduced to 2 tablespoons. Set aside to cool.

Toss the apples with the tapioca flour, the remaining sugar, the jelly, cider, lime juice, salt and grains of paradise. If you cannot get grains of paradise, fret not and use caraway seeds instead (ground).

Next, preheat the oven to 425 degrees F. Remove a disk of dough from the fridge and place on a lightly floured piece of waxed paper. Sprinkle with some more flour on top of the dough and roll out into a 12-inch circle. Place into a 9-10 inch tart pan that is 2 inches deep, preferably with a removable bottom. Trim the edges. Set a pie bird in the center of the pan.

Place the apples in the unbaked shell in circles, starting around the edges, working towards the center and forming a slight mound in the middle of the pie, around the pie bird. Pour over any remaining liquid. Roll out the second piece of dough as you did with the first. Place the dough over the apples, pressing the pie bird through the dough. Press together the edges of the dough around the rim of the pie. Brush the top crust with the juice reduction, but be careful not to brush close to the rim of the pie, or it'll stick to the pan completely.

If you have a heating coil in the oven, place the pie on the bottom rack, preferably on a pizza stone. If your oven has a flat bottom, place the pie on a sheet pan on the floor of the oven. Leave here for 30 minutes, then transfer to the lower rack (or, if using a pizza stone, one rack higher but no longer on the stone) for another 20 minutes. Remove to a rack and cool for a minimum of 4 hours before carving.

If you were using a pan with a removable bottom, slide the pie out of the pan and carve around the pie bird.

Mixed Berry Pie

2 pieces of pie crust
15 oz blueberries (fresh if you've got them, frozen if you don't)
15 oz raspberries (same)
1/4 cup all purpose flour
1/2 cup sugar
2 tsp freshly squeezed lime juice (the juice of half a lime)
2 tbsp unsalted butter
1 egg
1/4 cup milk
cinnamon

This one is quick and simple, and absolutely delicious. Set your oven to 425 degrees F. Start by placing a piece of pie dough in a 9 inch pie form and trim any excess off the edges. Keep the excess dough if you want to decorate the final pie (more on that later). Next, combine the berries with the flour, sugar and lime juice in a large bowl. If you bought frozen berries, make sure they're at least somewhat thawed first. Stir the mixture around until the dry goods are soaked up by the berries and juices.

Add the berries to the pie crust, sprinkle with a little bit of cinnamon and cut up the butter into small bits. Next, let's make some egg wash: beat the egg in a small bowl or glass. Add the milk and beat to combine. Roll out the second piece of pie crust and brush the edge (about 1 inch into the crust) with the egg wash. Flip around and cover the dough - the egg was will glue the top crust to the bottom crust a little better than just squeezing the two pieces together. Lightly brush the top of the dough with some egg was, making sure there are no "puddles" anywhere. If you wish to decorate the pie, roll out any excess dough into a thin sheet, and use cookie cutters or a knife to make a pattern. A heart works well, I should have done the π sign, but didn't :)

Cut three slits in the top crust, to let out steam. Bake the pie in the middle of the oven for 20 minutes, then lower the oven heat to 350 degrees and bake an additional 30 to 40 minutes, or until the juices are bubbly and the crust is browned. Remove and let cool for at least an hour before carving. Serve with vanilla ice cream.

Chicken and Broccoli Quiche with Fontina Cheese

1 pie crust
1 large broccoli head
2 chicken filets, skinless & boneless
2 tbsp grated onion
1 cup whole milk
1.5 cup shredded fontina cheese
4 large eggs
salt
pepper
nutmeg

Turn the oven to 350 degrees. Place the dough in a 9 inch pie form and trim off any excess (the excess can be discarded). Prick with a fork and, once the oven has reached the appropriate temperature, bake for 5 minutes or until lightly browned. Remove and let cool.

Cut the chicken into small pieces, about 1/4-1/2 inches. Fry in a non stick pan with a little amount of vegetable or olive oil, until cooked through. I usually increase the temperature when they're almost finished and get a nice, brown surface to the chicken bits. Makes for more flavor without drying the chicken out.

Wash the broccoli and cut off the florets. The size is up to you, I generally leave the smaller florets as they are and cut large ones into two or four pieces. Place in a microwave safe bowl with a 1/4 cup water and cook in the microwave on high for 1 minute. Remove, and discard the water. Place the chicken and broccoli in the pie shell.

Beat the four eggs in a medium bowl. Add the milk, shredded cheese, 2 tsp salt, 1/2 tsp freshly ground pepper, 1/4 tsp nutmeg and the grated onion. Stir to combine, and pour over the chicken and broccoli in the pie crust. Make sure you do not overfill the crust - if you have too much batter, leave about 1/4 inch at the top.

Bake in the oven for roughly 1 hour, or until nicely brown and a knife inserted in the middle of the quiche comes out clean and it feels like it's set nicely. Let cool for 10-15 minutes before carving. Serve with a green salad.

08 March 2009

Scotch Pancakes Revisited


I made the pancakes in the video in this post and they turned out better than I could have imagined. It's not the lightest of breakfasts, but the caramel sauce, the bananas (and I don't really like bananas) and the ice cream just works together so well, the pancakes are extremely light and fluffy...yum. I think I'll have to make some this weekend again!

Scotch Pancakes with Caramel Bananas and Rum

3.5 oz (100g) all purpose flour
1 tsp baking powder
pinch of sea salt
1/3 cup (80 ml) buttermilk
1/5 cup (50 ml) cold water
2 large eggs
sunflower oil for frying

4 large, ripe bananas
1.75 oz (50g) sugar
1.75 oz (50 g) unsalted butter
rum
2 tbsp water
vanilla ice cream for serving

Start by making the pancake batter. Weigh the flour and sift it into a bowl together with the baking powder. Mix together the water and buttermilk in a separate container. Add the salt to the flour, make a well in the middle and add about half of the buttermilk mixture and the two (beaten) eggs. Mix until you have a smooth batter, then add the rest of the buttermilk mixture.

Put about a tablespoon of oil in a large, non-stick frying pan over medium high heat. Use some kitchen paper to evenly coat the pan with the oil. Using a small ladle, pour some batter into the pan - if the pan is large enough you should easily be able to make two pancakes at once. Flip after about a minute and cook another 45 seconds on the other side. The pancakes should be browned and puff up slightly.

Peel the bananas and slice them lengthwise, you're looking to make about 1-inch long pieces, about 1/3 inch thick. Add the sugar to a non-stick frying pan over medium heat. Let the sugar melt without touching it - once it's melted, let it brown slightly before adding the butter. Stir to combine, then add the bananas. Let cook for about two minutes, or until the bananas are just tender. At this point, add a good splash of rum and light it - be careful, watch your eyebrows and the kitchen furniture. Once the rum, has burned and most the alcohol has evaporated, add about two tablespoons of cold water and cook for another thirty seconds or so.

Serve the pancakes on a plate with some bananas on top, add ice cream and drizzle with some of the caramel sauce. Eat immediately.

24 February 2009

Scotch Pancakes with Caramel Bananas and Rum

My good friend Luke just sent a link to this video and I just had to post it. Wow.

26 January 2009

Semlor


It is said that King Adolf Fredrik of Sweden (Adolf Frederick in English) died after having had a meal consisting of lobster, caviar, saurkraut, herring, champagne and then no less than 14 servings of semlor. That night, he had a cardiac arrest and died, 60 years old, in his bed. Not quite as exciting as his son - Gustav III of Sweden - who was assassinated (well, he died from the wounds some time later) . The semla, however, has survived and is still one of the most famous desserts in Northern Europe.

Originally, it was a sweet bun (baked with cardamom) served in a bowl with hot milk and they called it "hetvägg", which literally means "hot wall". These days, there are some more...let's say expensive ingredients, like almond paste and whipped cream, but some people still serve it with the hot milk as originally intended.

According to reliable sources (eh, Wikipedia), the name comes from the Latin "semilia" which was the finest wheat flour. There seems to be no translation to English for the words generally used for this fine product (semla, fastlagsbulle or hetvägg), so I'll just use the Swedish word for it - one semla, many semlor. There, you learned some Swedish today!

Traditionally, these baked little wonders were only served on the last Tuesday before lent, while Sweden was still a catholic country. Then, in the 16th century, protestantism came to the country and there was no more lent. These days, you can usually find it in pastry shops starting around Christmas all the way through Easter and I'm sure some places sell them throughout the year. Since they're not available in the US and I still have some of the almond paste my family sent me for Christmas, I decided to make some from scratch.

The only ingredient I have difficulty finding is fresh yeast. Luckily, it's not that hard to use active dry yeast instead. In addition, the recipes all call for ammonium carbonate (a predecessor to baking soda and baking powder), also called baker's ammonia, and that's not easy to find in normal convenience stores either. No bother, I modified a recipe a little and the end result tasted just the way I remember semlor should taste, so I will call it all a success. Now: let's get decadent!

Semlor

4 1/2 tsp (2 packets) active dry yeast
3 1/2 cups all purpose flour
1/4 cup white sugar
1 egg
6 tbsp unsalted butter
1 tsp ground cardamom
1 cup whole milk
1 pinch salt

almond paste (marzipan)
heavy whipping cream
powdered sugar

Start by melting the butter in a small pot over medium heat on the stove. Mix all the dry ingredients in a large bowl (or the stand mixer's bowl if using). Once the butter is melted, add the milk and heat up to around 115 degrees Fahrenheit, or a bit warmer than lukewarm. If you burn your finger testing the liquid, it's too hot! Add the egg to the dry ingredients and mix well (use the paddle attachment if using a stand mixer). Once the liquid is warm enough, add it to the bowl and mix well. You are looking for a slightly sticky, smooth dough. Add flour as necessary to achieve this - use the dough hook attachment for the stand mixer if using.

Once the dough is easy enough to handle without clinging to the bowl, knead it for another few minutes, then place in a warm place (free of drafts) under a clean kitchen towel and let rest for 30 minutes or until doubled in size. Once done, turn the dough onto a clean baking board (or your counter top, just...clean, ok?) and punch it down. Divide into about 15 equal pieces, roll them into smooth buns and place on a baking sheet (either greased or covered with baking paper). Make sure there's some space between each bun.

Turn the oven to 425, cover the buns with the towel and leave for 30 more minutes. The should roughly double in size again. Place in the middle of the oven for 10 - 15 minutes or until golden brown (but watch out, you don't want to burn them!). Let rest under a kitchen towel until cool. This is important, or the top of the buns might get too hard.

Once they are cool, it's time to assemble the actual semla! Cut off a lid (see picture above), then dig out the contents of the bun, making sure you don't destroy the "walls" of it. Place the bread you removed in a bowl and combine with roughly an equal amount of marzipan (almond paste) and a small splash of milk, just enough to moisten the contents. Mix this together, then place it back in the bun. Whip enough of the heavy whipping cream to cover the bun, replace the lid and sift powdered sugar on top. Enjoy!

As mentioned before, some people serve this in a bowl with warm milk. Me? I remove the lid, dip it in the cream and then eat the bun, one big bite at the time and it's extremely yummy.

Keep the unused buns in a zip lock bag in the freezer. When ready to use, remove from the bag and place in the microwave at low power for a minute or so.

16 January 2009

Apple Crumble


I am fully aware that I posted a recipe for apple marzipan pie just a week ago or so, but I made an apple crumble the other day and it's very different from the pie so I decided to post the recipe. Now, a crumble is very hard to mess up and it's quick to prepare. Just make sure you have some vanilla ice cream or custard to serve it with, as that will double the deliciousness.

Apple Crumble

3-4 apples (use a variety, if possible)
1 stick very cold butter (8 tbsp, 125g)
1 1/4 cups all-purpose flour
1/2 cups white sugar + a few pinches
ground cinnamon

Turn your oven to 425 degrees F (225 degrees C).

Start with the apples. Peel, remove the seeds and slice. A normal sized apple should make roughly 10-12 slices. The size isn't of a huge importance, and you can really dice them or cut them into little shapes that are vaguely reminiscent of Disney characters. It does not matter. I slice, because slicing is fun.

Next, grease a 9 inch form. You can use a pie form for this, or a square dish - as long as it's oven safe. I use butter, a little bit of vegetable oil would be OK too. Place the apples in the pan, coat with a few pinches of sugar and cinnamon.

Place the flour and sugar in a bowl. Add the chilled butter in small chunks and start crumbling with your fingers. Your goal is to get pea-sized grains of dough, but be sure not to over-work it. You're not looking to melt the butter and form a ball of dough here, we want crumbles. Once combined, drizzle the mixture over the apples. You don't have to completely cover everything, but you should be able to.

Place in the center of the oven for 30 minutes. Let cool slightly, but serve while still warm with some vanilla ice cream or cold custard to make it even better.

08 January 2009

Apple Marzipan Pie


A few weeks before Christmas, I received a large box from Sweden. I quickly tore it open and found a bunch of Swedish food from my family! In the pile (which also included Swedish coffee that I plan to drink over the next few weeks, yum) was a package of marzipan. Now, marzipan doesn't seem to be very common in the US. You can get it here, sure, but it seems to come pre-colored in smaller packages. In Sweden, not so much. You buy it in just-over-a-pound packages (500g) or more, some make little gnomes with red hats for the holidays, others bake with it, and - more often than not - most people I know end up consuming half the package, idly snacking away while it's stored in the pantry.

I decided to bake with it! Now, I love to make apple crumble and I had apples at home for that very reason. I then realized I had the marzipan and some pie crust and thought it might be an even better idea to try out something different. I'll make the apple crumble soon again and might post my ultra-secret, century-old family recipe (mostly because Jacquie liked that better than this) and I'll use the second half of my marzipan for something else. Mazarins, perhaps?

I happened to have pie crust in the fridge, but you should make your own because it will be approximately 2.32 times better than the pre-made, store-bought one. Here's the recipe. Enjoy!

Apple Marzipan Tart
For the crust:
  • 4.5oz chilled butter
  • 1.5 cups all-purpose flour
  • 3 tbsp powdered sugar
  • 1 egg
For the filling:
  • 4 apples (your choice - I generally do two or three different ones)
  • 0.5lb marzipan, uncolored
  • 3 eggs
  • 0.5 cup whole milk
  • 4 tbsp raw/brown sugar

Start with the crust. Make sure you work quickly and efficiently, as the butter cant be allowed to heat up. Place the flour and sugar in a food processor and pulse a few times to mix well. Add the chilled butter in half-inch cubes and pulse again, 4-5 times, until it looks like crumbles. Add the egg and pulse another few times until it's combined. Remove from the bowl, form a ball and wrap in plastic wrap. Place in the fridge for a minimum of one hour, up to one day.

Once finished, press the dough out into a greased 9-inch pie pan (preferably with a removable bottom). Prick the bottom of the crust with a fork and place back in fridge.

Turn your oven to 400 degrees F (200 degrees C).

In a bowl (or the bowl of a stand mixer), coarsely shred the marzipan. Add the egg and milk and mix well - use the paddle mixer if you're using a stand mixer. Once combined, pour into the pie crust.

Next, wash and peel your apples, then slice into thin wedges. Press the wedges into the battered pie crust in a circle. Sprinkle with the brown sugar.

Place in the lower half of the oven for 40 - 45 minutes or until the batter has set completely and the apples have browned nicely. Serve warm with vanilla ice cream or custard. Store, covered in tin foil or plastic wrap, for up to a week.