Showing posts with label baking. Show all posts

16 February 2014

Kuvertbröd - Swedish Dinner Rolls


My grandmother, who passed away about a year ago, was a great cook and baker. I will always cherish the memories of having lunch at my grandparents' house because I knew I would get either meatballs or pancakes, which, to a Swedish kid, are about the best things you can eat in the whole world. One thing I had forgotten she baked (until my mother reminded me last Christmas) are these kuvertbröd - literally "envelope bread." At least that's what I thought all my life, until writing this blog post made me think, "That's a weird name for a piece of bread that looks nothing like an envelope." That's when it hit me: A kuvert in Swedish can mean both an envelope and a place setting (i.e., the plate and all the things that go with it - cutlery, napkin, glass, and whatever else). Using my Swedish brain even more (it's been a while since I spoke Swedish with any regularity), I recalled that you would use the word when talking about how many people would be coming to a dinner party.

With all this knowledge flooding back, I realized why these awesome little dinner roll-like pieces of bread are called what they are: They're individual servings that go perfectly with your dinner without having to share or slice bread. A cursory Google search proved me right: The name stems from the fact that they are for the individual and not for sharing with others around the dinner table. Bork, bork, bork!

Recently, I've found myself using these rolls for breakfast. I know that may sound weird to anyone in the U.S. reading this, but in Sweden, having a sandwich (we call it a macka) for breakfast is perfectly normal. We generally top ours with butter, Swedish cheese (which I currently purchase at IKEA), and maybe a slice of cucumber or tomato. A future blog post will feature the macka - I promise - and it's as Swedish as Absolut Vodka and ABBA. Read the Dragon Tattoo books and you'll find that they're having coffee and mackor (plural of macka) on every other page!

Anyway! This recipe is easy but made way easier with a stand mixer. It makes 24 rolls, and they freeze really well.

Kuvertbröd - Swedish Dinner Rolls

5 cups AP flour
50 g (about 3.5 tbsp) unsalted butter
2 tbsp active dry yeast
2 cups + 1 tbsp whole milk
1 tbsp white sugar
2 tsp salt
1 egg

1. Melt the butter in a small pot over low heat.

2. While the butter is melting, mix the flour, yeast, sugar, and salt in the bowl of a stand mixer.

3. When the butter has melted, add the milk and heat to 118 degrees F (48 degrees C).

4. Add the milk/butter mixture to the dry ingredients and knead with the dough hook for 5 minutes. If not using a stand mixer, mix with a wooden spoon until everything comes together, then knead with your hands for 5 minutes.

5. Place the dough in a lightly floured bowl - it's likely pretty sticky at this point. Let rest under a kitchen towel for 30 minutes.

6. Turn your oven to 480 degrees F (250 degrees C).

7. Punch the dough down and divide into 24 equal parts - I use a kitchen scale for this. If you don't have a kitchen scale (digital), go get one. So useful.

8. Roll each piece of dough into a ball between the palms of your hands and place on a baking sheet, leaving about 2 inches of space between each piece.

9. Cover the dough with a kitchen towel and let rest another 30 minutes.

10. Crack the egg into a bowl and lightly whip with a fork.

11. Lightly brush each roll with the egg and sprinkle a little bit of sea salt on top. Alternatively, you can sprinkle with sesame seeds or black poppy seeds. Or just omit the sprinkling of anything at all.

12. Bake in the middle of the oven for 10 minutes or until golden brown.

13. Let rest on a cooling rack until cool enough to touch before cutting in half, slathering with butter, and trying not to eat too many in one sitting.

Once completely cooled, you can freeze the rolls in a Ziploc back for up to six months. While they can be toasted, I prefer mine not to be. Instead, I microwave a roll for 30 seconds on low power, then cut in half and microwave again on medium power for about 10 seconds. Your results may vary depending on your microwave, and you need to experiment with the timing if you're defrosting more than one roll at a time.

10 February 2014

Chocolate Coffee Cookies


I love cookies. The chocolate chip cookie recipe I've posted in the past is a staple, and I try to bake them pretty frequently - my wife and all of our respective coworkers seem to appreciate it when I do. While chocolate chip is awesome, you can really make a more interesting dough than just a butter/flour/sugar mix. Case in point: I made cookies that do contain chocolate chips but also have two more of my favorite things in the dough itself: coffee and alcohol. Chocolate coffee cookies!

Chocolate Coffee Cookies

2 cups + 2 tbsp (9.6 oz) AP flour
1/4 cup cocoa powder
3 tbsp instant coffee powder
1/4 tsp sea salt + more for topping
1/2 tsp baking soda
1 cup brown sugar
1/2 cup granulated white sugar
1 stick (8 tbsp) unsalted butter
1 egg + 1 egg yolk
2 tsp vanilla extract
1/4 cup coffee liqueur (like Kahlúa)
1 cup chocolate chips (I used a mix of dark chocolate and white chocolate chips)

1. Melt the butter over low heat in a small pan (or in the microwave) and let cool for at least ten minutes.

2. Mix the flour, coffee powder, salt, baking soda, and cocoa in a bowl.

3. In a separate bowl, mix the butter and sugars until combined.

4. Add the coffee liqueur to the butter mixture and mix thoroughly.

5. Add the flour to the butter mixture gradually and completely incorporate.

6. Fold in the chocolate chips.

7. Wrap the dough in plastic and refrigerate for an hour.

8. About 20 minutes before removing the dough from the fridge, turn your oven to 325 degrees F.

9. Remove the dough from the fridge and shape into 1.5-inch balls.

10. Place the balls on a parchment paper-lined baking sheet, leaving about 2 inches between each ball, and sprinkle with sea salt.

11. Bake for about 12 minutes or until the edges are set (the center may not be completely set).

12. Remove from the oven and let cool slightly before moving to a cooling rack to cool completely.

11 January 2014

Swedish Cinnamon Rolls: Kanelbullar


I posted a recipe for cinnamon rolls a while back, and while they are definitely well worth baking, I prefer the Swedish kind I grew up with. The Swedish version is not as sweet (as they're not glazed) and contains cardamom, which you'll find pretty frequently in the Swedish kitchen (for example, it's featured in the mulled wine we drink around Christmas: glögg).

The only ingredient that might be difficult for non-Europeans to find is pearl sugar, apparently also called nib sugar. While, yes, it's "only sugar," it's a pretty integral part of the recipe. Some IKEA stores might carry it (Swedish name: pärlsocker). I couldn't find any at my local IKEA store, but I did find some in a kitchen supply store. I recommend kitchen supply stores to anyone looking for hard-to-find ingredients or any kitchen hardware, bar perhaps appliances. If you happen to be in Southern California or Arkansas, Surfas is well-stocked. If you really can't find pearl sugar, you absolutely can glaze these cinnamon rolls, or you can top them with chopped almonds or even some sprinkles. I'd add the sprinkles after they're cooked, though. Just in case.

Swedish Cinnamon Rolls

2 cups whole milk
1/2 oz (14 g or ~5 tsp) active dry yeast
1 tbsp ground cardamom
5 oz (1 1/4 stick) unsalted butter at room temperature
1 egg
1/3 cup + 1 tbsp sugar
1 1/2 tsp baking powder
1/2 tsp kosher salt
5 cups AP flour

Filling
5 oz (1 1/4 stick) unsalted butter at room temperature
4 tbsp cinnamon
1/3 cup + 1 tbsp sugar

Topping
1 egg
pearl sugar (see note above)

paper baking cups

1. Cut the butter into small cubes and set aside.

2. Mix the milk and cardamom together. Heat in a pot over medium heat or in a microwave at 50% power until 118 degrees F (48 degrees C).

3. While heating the milk, thoroughly mix the flour, yeast, sugar, baking powder, and salt in a mixing bowl.

4. Pour the milk into the bowl of a stand mixer (if using) and add the egg.

5. Add the flour mixture to the milk and mix with the dough hook for 8-10 minutes. If not using a stand mixer, buy a stand mixer. Just kidding (or am I?). If not using a stand mixer, mix with a wooden spoon until everything comes together, then knead with your hands for 10-15 minutes. Add the butter, one cube at a time, until incorporated.

Note: if the dough is very wet and sticky, add a little more flour. The more flour you add, the drier the end product will be, so be careful! The dough will lose a little stickiness after rising.

6. Allow the dough to rise under a kitchen towel for 40 minutes.

7. Lightly dust a workbench with flour and pour out the dough on top. Turn the oven to 480 degrees F (250 degrees C).

8. Knead the dough for a few minutes, adding more flour if very sticky. Split the dough into two parts.

9. With a rolling pin, roll each part into a rectangle, about 1.5 times longer than it is broad. The end result should be about 1/3 of an inch thick.

10. Mix the butter, cinnamon, and sugar for the filling together until it forms a smooth paste.

11. Spread half of the filling across one of the dough pieces, ensuring you cover all of it.

12. Roll the dough into a tight "log" from one of the long sides (filling side on the inside, obviously).

13. Cut the log into roughly 1/2-inch thick pieces (you may need to discard the very ends if there's not enough filling there).

14. Place the paper baking cups onto a cookie sheet. Place a cinnamon roll into each cup, cut side up.

Repeat steps 11 - 14 with the other piece of dough.

15. Sprinkle pearl sugar (if using) on top of each roll and bake in the middle of the oven for about 10 minutes or until golden brown. Keep an eye on them - they burn fairly easily!

16. Let cool for a few minutes before consuming.

These go best with coffee or a glass of ice-cold milk. When I made the ones pictures above, it was too late for coffee and milk didn't feel quite right. My wife, Jacquie, realized that a White Russian was the perfect substitute for both - it's a cocktail, it has milk, it has coffee. What's not to like?

12 April 2012

Sourdough Boule


If you're a frequent reader of this blog, you know that I love to bake. After buying Pete Reinhart's Artisan Bread Every Day, I started playing around with a variety of recipes (mostly for ciabatta and pizza dough) and found that it's very easy to make a great-tasting bread. It really is. It gets easier with a stand mixer, a good oven, a baking stone, and lots of patience, but it's NOT difficult.

Sourdough bread, however, had escaped me for the longest time. I tried to create my own, but apparently there isn't enough viable wild yeast floating around my kitchen to really get it going. That, or I simply suck at making sourdough from scratch. No matter - I purchased some wild starter from Breadtopia, and a few days later, I had my own so-called "mother starter" (at least that's what Reinhart calls it). This thing is incredibly resilient and came alive less than 12 hours after its first "feeding" (addition of water and flour), even after spending a week in the mail on the way to Austin. I keep it in the fridge perpetually and will feed it every week or so, or whenever it gets a little low.

The first recipe I decided to try out was a simple sourdough boule. It is incredibly easy to make, provided you have the necessary equipment: a baking stone, a pizza peel, and a banneton. You don't really need the banneton, but it does help in forming a pretty loaf.

Sourdough Boule

10.5 oz (300g) bread flour
7.25 oz (200g) water at 110 degrees F (43 degrees C)
1.75 oz (50g) sourdough starter
1/8 oz (5g) kosher salt

Add the water and starter to a large bowl. Break up the starter. Add the remaining ingredients and mix thoroughly with your hands or a wooden spoon. You can also do this in a stand mixer with the paddle attachment if you prefer. Lightly flour a work surface. Turn the dough onto the work surface and stretch and fold once. Place in a clean, lightly-floured bowl. Cover with plastic wrap or a clean kitchen towel and let rest for one hour at room temperature.

After an hour, turn the dough back out on the work surface and do another stretch and fold. Place back in the floured bowl and let rest, covered, another hour. After an hour, turn the dough out onto the work surface and do one final stretch and fold, forming a ball from the dough. Lightly flour your banneton. If you don't have one, a bowl lined with a clean, lint-free towel will do the trick. Place your dough ball, seam-side up, in the banneton. At this point you need to place the banneton in the fridge overnight, but it needs to be airtight. A large plastic bag will work, or you can put the banneton in a larger bowl and just cover the top of the bowl with plastic wrap. If you're using a bowl with the towel, just fold the towel on top of the dough and cover with the plastic.


The next day, turn your oven to 450 degrees with your baking stone in the middle and a pan that can take a hit of hot water (such as a cast iron pan or an old, crappy metal pan you don't care about anymore) in the bottom of the oven. Turn the dough out onto a floured pizza peel (or the back of a sheet pan covered with parchment paper). Lightly cover with plastic wrap or a clean towel and let rest for two hours.


After two hours, score the top of the loaf lightly with a sharp knife. Slide the bread onto the baking stone (with the parchment paper if not using a pizza peel). Immediately add about a half cup of hot water to the pan at the bottom of the oven. Close the door and wait for three minutes. Next, place an oven-safe bowl over the loaf. Bake another 15 minutes, then remove the bowl and bake the final 20 minutes. The loaf should be a rich brown and sound hollow if thumped on the bottom.

Let cool on a cooling rack for at least 30 minutes before slicing and serving. And try not to eat the whole damn thing in one sitting.

Note: If your sourdough starter isn't super potent, it's fine to add about a teaspoon of instant yeast to the dough to improve its proofing.

25 January 2011

Red Berry Cobbler

This is a variation of a recipe I found in New American Table, a cookbook by a chef born in Ethiopia, raised in Sweden, and living in New York City. The flavors are much more complex than a standard cobbler, thanks to the red wine, cardamom, and honey. You can prepare these until they're ready to go in the oven, then refrigerate for up to three days. Perfect, in other words, to make in advance for that big dinner party!

Red Berry Cobbler

2 cups AP flour
3 tbsp white sugar
3/4 cup light brown sugar
1/2 tsp baking powder
1/2 tsp baking soda
1/2 tsp salt
1/2 tsp ground cardamom
1/2 tsp ground cinnamon
6 tbsp unsalted butter (cold)
1 cup milk or buttermilk
1 vanilla bean or 1 tsp vanilla extract
1/2 cup honey, preferably raw
zest of 1 lemon
2 tbsp cornstarch
3/4 cup dry red wine
2 cups fresh raspberries
3 cups fresh strawberries
confectioners' sugar for dusting

Start by heating the oven to 400 degrees F. In a large bowl, stir together the flour, white sugar, baking powder, baking soda, salt, cinnamon, cardamom, and 1/4 cup of the brown sugar. Cut the butter into small pieces and add to the flour mixture. Mix with your fingers until a mealy mixture is formed. Add the milk and stir with a spoon until a very wet dough is formed.

Cover a cookie sheet with a parchment paper. Divide the dough into 10 2-inch wide biscuits. Bake in the oven until golden brown, about 15 minutes.

In the meantime, prepare the filling. Hull the strawberries and cut them into quarters. In a small bowl, mix the honey, lemon zest, cornstarch, and the seeds of the vanilla bean or the vanilla extract, depending on which you're using. In a medium saucepan, bring the red wine to a boil. Reduce to a simmer, then add the honey mixture and stir continuously until it thickens slightly. Stir in the fruit and the remaining 1/2 cup brown sugar and cook until the sugar dissolves. Remove from the heat.

Butter either twelve 4-ounce or six 8-ounce ramekins. Crumble up the biscuits and divide half of them into the ramekins. Add equal amounts of the berry filling on top of the biscuits, then crumble the remaining biscuits on top. Cook in the (still 400 degree) oven for about 15 minutes, or until bubbling. Be careful not to let the biscuits on top burn - if they start to brown too quickly, cover with some aluminum foil.

Let cool for 5 minutes, then dust the top with confectioners' sugar and serve, preferably with ice cream.

30 October 2010

Oatmeal Cookies


I’m back! Finally! After a couple of crazy months (wedding, new house, new car, new department at work), I’m ready to start updating the blog again. I’ve been taking some pictures of things I made recently, so that should get me started at the very least!

First up: cookies. I do apologize for the low-quality picture, but I did not have my nice camera readily available. Cell phone pictures aren’t as good, but it’s what I’ve got! Either way, I decided to make chocolate chip cookies the other day, and while I was at it, played around with some oatmeal cookies. I think I liked the latter even better than the former, so here’s the recipe!
The oatmeal cookies are on the right in the picture, if that wasn't obvious.

Oatmeal Cookies with Walnuts


1 cup (2 sticks) butter, softened

1 cup white sugar

1 cup light brown sugar

2 large eggs
1 tsp vanilla extract

2 cups all-purpose flour
1 tsp baking soda

1 tsp salt
1 ½ tsp cinnamon

3 cups quick oats
½ cup chopped walnuts


First of all, turn your oven to 375 degrees F. Next, cream the butter and sugars together until very pale. I recommend doing this in a stand mixer, but a handheld one will work as well. Lowering the speed of the mixer to the slowest, add the eggs, one at the time. Next, add the remaining ingredients and stir until combined. Be careful not to over-mix!

Line a cookie sheet with parchment paper. Roll the batter into roughly golf ball-sized balls, and place them about three inches apart on the paper. Bake the cookies in the center of the oven for 10-12 minutes or until they just start to brown. Make sure you let them cool completely on a cooling rack, but don't move them for the first couple of minutes after removing from the oven – they will be quite soft and fragile, and might break.

Enjoy!

30 May 2010

Regional Dinner Party: Spain


I've been meaning to have people over for dinner now and then, cooking a multi-course dinner from a specific region or country, and we finally had our inaugural event the other day. The first country to appear on the menu was Spain, and this was my first time cooking Spanish food other than some random odds and ends. The full menu consisted of:

  • Spanish cheeses with Pan de Horno
  • Cauliflower with cherry tomatoes and Serrano ham
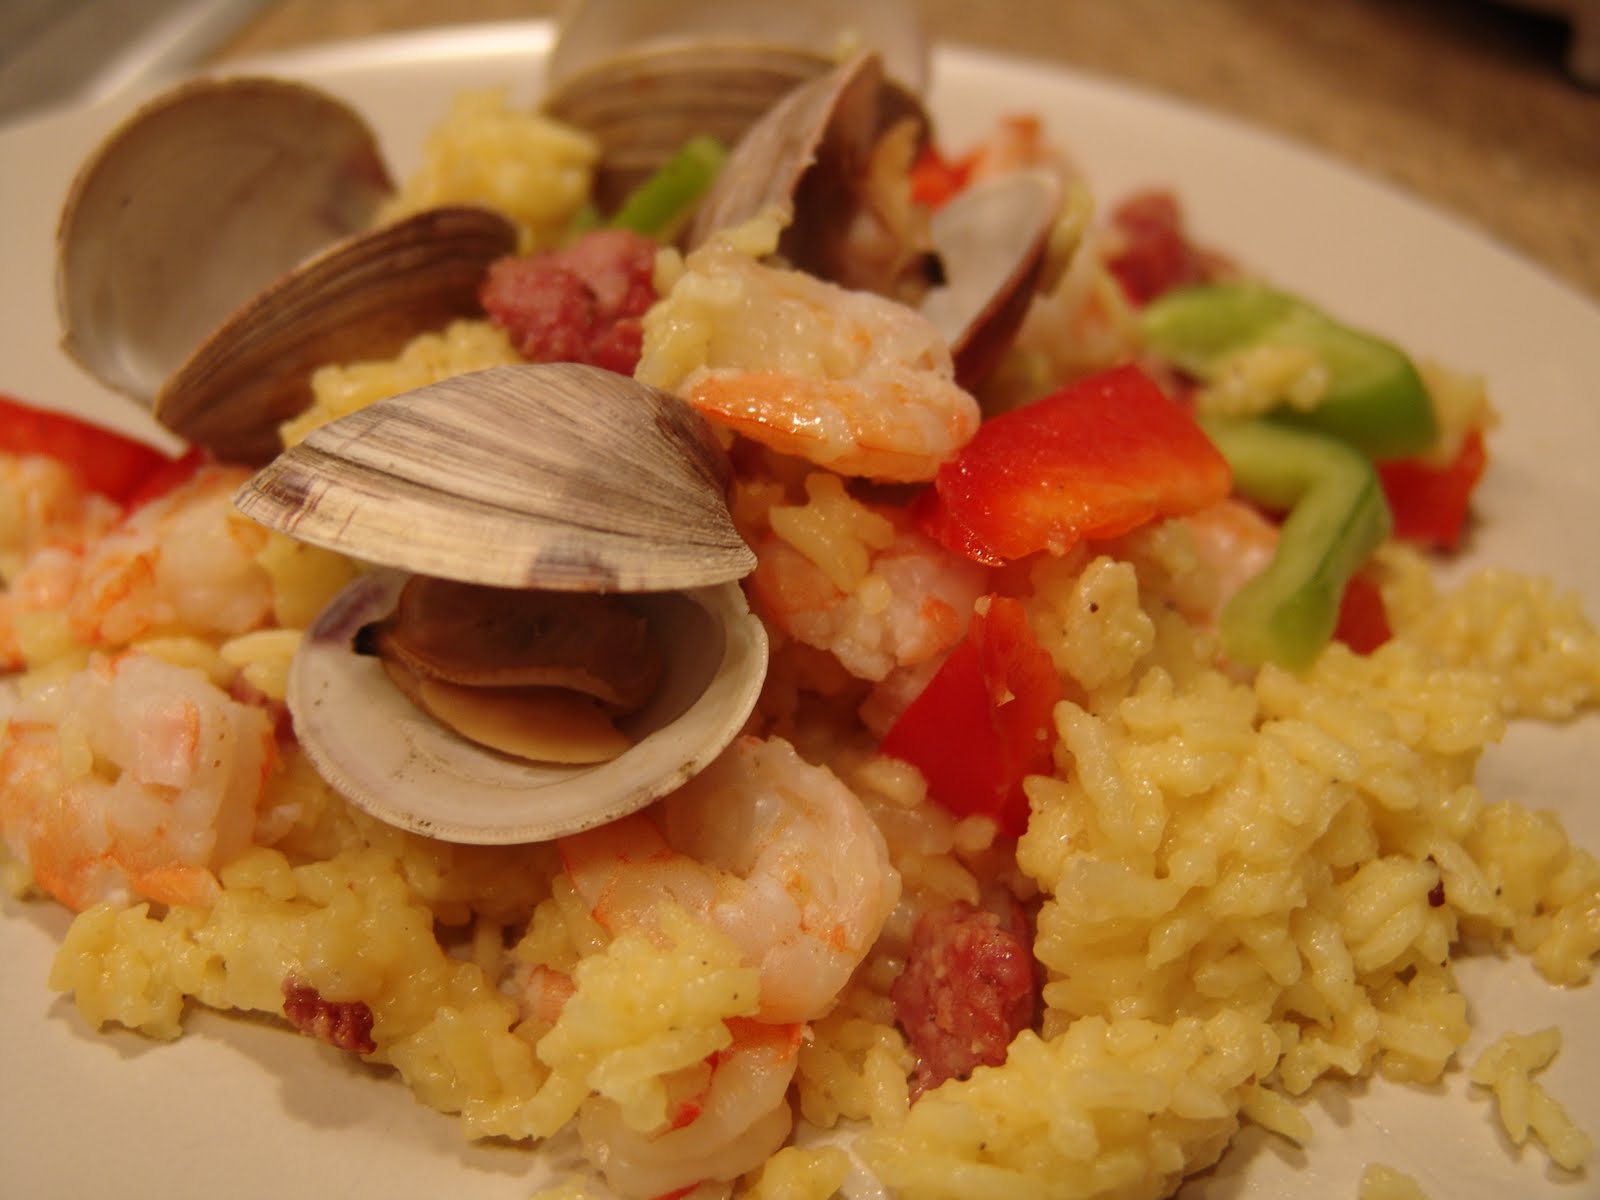
  • Paella de marisco (seafood paella)
  • Bizcochos Borrachos (drunken sponge cake)
  • Licor 43 con leche
The dinner was certainly a success. I just wish I had taken pictures of everything!

Pan de Horno

1 tbsp instant yeast
3 cups warm water
7 cups unbleached all purpose flour
2 tsp salt
1/4 cup olive oil

Mix the yeast and water in a small bowl and let sit for ten minutes. Sift the flour and salt together into a large bowl. Using your fingers, mix in the oil with the flour mixture. Pour the yeast mixture into the flour mixture and stir with your fingers until the dough is firm and slightly sticky. Pour the dough onto a lightly-floured work surface and knead another two or three minutes.

Grease a bowl with olive oil and place the dough in it. Cover the bowl with a towel and leave until doubled in volume, about an hour. Once the hour is over, punch the dough down and move to a floured work surface. Knead a few seconds, then return the dough to the bowl and cover for another 15 minutes.

Cut the dough into two pieces, then form loaves. Place on a greased pan and cut slits on top of the bread. Turn the oven to 450 degrees F. Cover and let raise for 30 minutes, then bake in the oven for around 30 minutes or until the top is toasted and the loaves sound hollow when knocked on the bottom. Remove to a cooling rack and leave until completely cooled.

Cauliflower with Cherry Tomatoes and Serrano Ham
1 large head cauliflower
1/2 red onion
1/3 cup olive oil
1 cup cherry tomatoes
1/4 lb thinly-sliced Serrano ham
1 1/2 tbsp fresh lemon juice
1/4 cup finely-chopped fresh flat-leaf parsley
Start by cutting the cauliflower into 1-inch florets. Boil salted water in a large pot, then add the cauliflower florets and cook for 5 minutes or until tender. Drain in a colander and set aside. Next, cut the ham into 1-inch pieces and cut the tomatoes in half.

While the cauliflower cooks, fry the onion with the olive oil in a large frying pan over medium heat. Once the onion has turned translucent (about three minutes), add the tomatoes and ham. Cook until just heated, about two minutes. Remove from the heat and add the lemon juice and parsley. Combine with the cauliflower and serve warm or at room temperature.

Paella de marisco
1 lb chorizo
1 lb shrimp
15 clams
15 mussels
1/2 cup white wine
1 large yellow onion
5 cloves of garlic
2 cups medium grain white rice
4 cups chicken stock
4 cups water
2 red peppers
1 green pepper
1 tsp saffron threads
1/4 cup olive oil
salt
pepper

I, unfortunately, do not have a paella pan or a pan large enough to cook a paella, so I have to resort to the oven method, which works quite well.
Start by peeling the shrimp, reserving the shells. Put the shells and four cups of water in a large pot over medium heat. Simmer for about 20 minutes, or until reduced to 2 cups. Pour through a fine mesh, reserving the liquid and discarding the shells. Set the newly-created shrimp stock aside.

Boil water in a large pot and add the shrimp. Cook for 2-3 minutes or until just cooked through. Drain and set aside. Crumble the chorizo and cook over medium heat in a large skillet. Set aside.
Clean the mussels and clams, discarding any that do not close when tapped. Add the wine to a large pot and bring to a simmer over medium heat. Add the mussels and clams, then cover. Cook for 3 to 4 minutes or until the shellfish are open, shaking the pot occassionally. Remove any mussels or clams that did not open completely, then set aside.

Turn the oven to 375 degrees F. Heat the oil in a large skillet over medium heat, then add the onion (chopped) and garlic (minced) and cook for about five minutes. Add the rice, shrimp stock, 3 cups of chicken stock, saffron, about 1 teaspoon of salt and 1 teaspoon of pepper and cover. Simmer for about 15 minutes or until the rice is al dente and some liquid remains. Transfer to an oven-safe dish, add the shrimp, chorizo, mussels and clams and cover with tin foil. Bake for 30 minutes and serve immediately.

Bizcochos Borrachos

4 eggs
1/2 cup granulated sugar
3/4 cup flour
1 tsp baking powder
1/3 cup granulated sugar
8 oz water
1.5 tbsp honey
1 1/2 oz rum
1 cinnamon stick
peel from 1/2 lemon

Turn the oven to 350 degrees F. Grease an 8-inch cake pan with vegetable shortening and flour it (add flour, shake until coated, turn upside-down to remove excess).

Separate the egg yolks from egg whites. Beat the yolks with the sugar in a medium bowl until creamy. Using a stand mixer (or electric mixer), beat the egg whites until forming soft peaks. Carefully fold the yolk mixture into the egg whites. Next, fold in the flour and baking powder. Pour the batter into the cake form and bake in the center of the oven for 20 minutes or until a toothpick inserted into the center of the cake comes out clean. Let the cake cool completely before serving.

To make the sauce, add the sugar and water to a large sauce pan and place over medium heat. Add the cinnamon stick, honey and lemon peel and let simmer for about 2 minutes, stirring occassionally. Remove from the heat, add the rum and let cool to room temperature.

Cut the cake into 9 pieces and serve each piece with a drizzle of the syrup.

Licor 43 con leche

Licor 43
milk
Licor 43 is a liqueur from Cartagena, Spain, made from citrus fruits, vanilla and a variety of other herbs and spices - 43 in total (hence the name). I served this with warm milk, as I've been told that's the way they do it in Spain. The liqueur itself also works well on its own or on the rocks.

06 April 2010

Pizza - again!


I know this is the fourth post about pizza, but...just look at it! The last pizza recipe I posted was Alton Brown's, and while it's good, it's not as good as this. I wrote about Peter Reinhart's ciabatta recipe relatively recently, and this recipe is based on the same technique but has slightly different ingredients. Look at that crumb! It's absolutely divine.

Pizza

24 oz unbleached bread flour (roughly 5 1/3 cups)
1 tbsp coarse kosher salt
1 tsp instant yeast
1 1/2 tbsp honey
2 cups plus 2 tbsp water at room temperature
2 tbsp olive oil

Place all the ingredients in a large bowl or the bowl of a stand mixer. Mix on low speed for one minute (with the paddle attachment if using a stand mixer or with a wooden spoon if mixing by hand). Let stand for five minutes. Switch to the dough hook and mix another three minutes on medium-low speed (or mix by hand if not using stand mixer).

Transfer the dough to a lightly oiled surface. Stretch and fold the dough once, as described in the ciabatta recipe linked above. Tuck the dough into a ball, then divide into four pieces. Form each piece into a ball, then place into a separate sandwich-sized freezer bag misted with spray oil. Refrigerate overnight (or up to four days) or freeze for up to several months. If you do freeze, remove to fridge the night before baking the pizza, then follow the rest of the recipe below.

About 90 minutes before you plan to bake the pizza, remove the dough from the fridge. Stretch each piece of dough and make it into a ball, then place on a lightly oiled surface, loosely cover with plastic wrap and let rest until ready to bake. An hour before baking, place a baking stone in the lower part of the oven and turn the oven to the highest temperature it will go (usually 500 or 550 degrees F).

When ready to bake, dust the work area and each piece of dough with flour. If using a pizza peel, dust it as well (if not, the back of a sheet pan will work fine as well). Place one piece of dough on the work area, then press on the top to form a disc. Lift it and gently pull on the edges, rotating as you go, until the middle is very thin and you have a thicker edge. Place on the pizza peel and rest for 10 minutes.

Top the pizza as desired (the above photo was tomato sauce, fresh oregano and mozzarella cheese), then slide onto the baking stone and bake for about 4 minutes. Open the oven and turn the pizza, then bake another 3-7 minutes, or until crust is fully baked and cheese is browned. Remove from the oven and let cool at least a couple of minutes before slicing and serving.

30 March 2010

Buffy's Bacon Biscuits

Our dog, Buffy, is a wonderful little dog! She's a rat terrier mix and definitely has a lot of dachshund in her, considering her length and that cute little face. Buffy, like most other dogs, loves treats. She also has a fairly sensitive stomach, so I figured making some relatively healthy dog treats from scratch might be a good idea. This recipe has bacon and bacon fat (the less healthy part), as well as whole wheat flour, which is filling and somewhat nutritious, at least.

Buffy's Bacon Biscuits

5 cups whole wheat flour
1 cup milk
1 lb bacon
1/2 cup cold water

Start by heating the oven to 350 degrees F. In a cast iron pan (or other frying pan if you don't have one), cook the bacon in batches over medium low heat. Make sure you do not empty the pan - save those drippings! Crumble the bacon into a large bowl or the bowl of a stand mixer if you have one. Add the flour and milk and mix well (use the paddle attachment if you're using the stand mixer). Switch to the dough hook and stir in the bacon drippings. While kneading, add as much cold water as needed to make a moist dough.

At this point, grease a cookie sheet. Roll the dough out until it's about 1/4 of an inch thick, in batches if necessary. Use cookie cutters or a knife to shape the biscuits. Place them about 1 inch apart on the cookie sheet and bake for 35-40 minutes in the middle of the oven.

Let cool completely, then store in an airtight container. Note that bacon fat goes rancid faster than other fats, so you may want to store these treats in the fridge.

So did she like them? I think so:

18 March 2010

Lemon & Almond Biscotti


Ignoring the fact that I'm posting about something sweet twice in a row (man, those muffins were good), I really love biscotti and made some tonight, so I thought I might as well update the blog as well. Biscotti, or "biscuits" in Italian (it apparently also means "twice baked"), is a wonderful hard cookie/biscuit/cracker that goes great with a cup of strong espresso or even a glass of wine. You bake a sort of loaf of the "bread" first, then divide it into smaller pieces and bake those for some additional time to create the actual cookies. This recipe includes nuts, lemon zest, and a white chocolate shell. Heavenly - and simple to make.

The current leader in the most recent poll is Italian food, so here you go!

Lemon & Almond Biscotti


2 cups unbleached AP flour
3/4 cup cornmeal
1 1/2 tsp baking powder
1 tsp salt
1 cup granulated sugar
3 eggs
zest of 3 medium lemons
3/4 cup almonds, blanched or roasted
12 oz white chocolate chips

Turn the oven to 350 degrees F. Line a baking sheet with parchment paper or a silicone baking mat.

Mix together the flour, cornmeal, baking powder and salt in a large bowl. In a different large bowl, or the bowl of a stand mixer, beat the sugar and eggs until very pale, about 2 minutes. Grate in the lemon zest and slowly add the flour mixture while beating. Stir in the almonds and let rest for at least 5 minutes.

Divide the dough in half and make two 3x9 inch "loaves" on the baking sheet. If too sticky, use wet hands. Make sure the dough has a little room to grow; don't place the loaves too close together. Bake in the middle of the oven for 30 minutes.

Once finished, remove from the oven and let cool for about 10 minutes. Next, using a serrated knife, cut the loaves into roughly 1-inch-thick slices and return to the baking sheet, cut side up. Bake an additional 25 minutes, or until golden.

Let the biscotti cool completely. Create a double boiler by barely simmering water in a pot and placing a heatproof (metal or glass) bowl over the pot - just make sure the bowl does not touch the water. Add the chocolate chips and stir until completely melted. Remove from the heat, and dip one end of each biscotti in the chocolate. Place on a cooling rack until chocolate has hardened.

These cookies will last you at least a week in an airtight container.

09 March 2010

Raspberry Muffins

I really can't believe I haven't posted a decent muffin recipe yet! I love muffins, and maybe it's just that I eat them so quickly that there's no time to post pictures or recipes! Either way, here's one of my favorites: raspberry muffins. The muffins themselves are very simple to make but do require a special tool: the muffin pan. I have a cheap version bought at Target, and this is definitely a case where you don't need to spend hundreds of dollars (or Euros, or...I guess thousands of crowns or pesetas, or whatever you use) on a piece of kitchen equipment.

Raspberry Muffins

2 cups AP flour
1 tbsp baking powder
1/2 tsp salt
1/4 freshly grated nutmeg
2 large eggs
1 cup milk
2/3 cups sugar
1/2 cup vegetable oil
1 tsp vanilla extract
1 1/2 cups fresh raspberries
Sugar for sprinkling

Turn your oven to 400 degrees F. Grease a 12-slot muffin pan with either melted butter or vegetable oil. Cut the raspberries in half. Mix your flour, baking powder, salt and nutmeg together in a bowl. In a separate bowl, lightly beat the eggs, then add the milk, sugar, oil and vanilla extract. Using quick and light strokes, add the wet ingredients to the dry ingredients. Make sure you do not overmix, just wet the flour mix through. It's perfectly all right that the batter is lumpy at this point.

Fold in the raspberries. Divide equally into the cups in the muffin pan. Bake for 18-20 minutes, or until a toothpick inserted into a muffin comes out clean. If desired, remove the muffins from the oven after about 10 minutes and sprinkle with sugar, then let bake the remaining 8-10 minutes.

Let the muffins cool for a few minutes before moving to a cooling rack. They are best served within a few hours of cooking, but if not eating immediately, let cool completely and store in an airtight container for up to three days.

23 February 2010

Cinnamon Rolls


There's a pretty major difference between the cinnamon rolls I remember from my childhood in Sweden and what I'm used to seeing in bakeries or, for that matter, in U.S. homes. Not that I've been offered cinnamon rolls in any U.S. homes lately, but I've just never seen the smaller Swedish version anywhere else. We call them kanelbulle, which means "cinnamon bun," more or less.

These cinnamon rolls are, as the picture may have already told you, more in the style of what you'd find in a bakery (or a U.S. home, I guess). Either way, they are delicious and I recommend you go make them right now!

Cinnamon Rolls

28 oz (roughly 6 cups) unbleached all purpose flour
2 tsp salt
1/2 cup + 6 tbsp sugar
5 tsp active dry yeast
2 cups + 2 tbsp whole milk
1/2 cup + 2 tbsp melted butter
2 tbsp cinnamon
1/2 cup sugar

Start by heating the milk until it is about 100 degrees F. Combine the flour, salt and 6 tbsp sugar in a mixing bowl. In a separate bowl, whisk together the yeast and the milk until the yeast is completely dissolved. Pour the mixture over the dry ingredients together with the 1/2 cup of melter butter, then stir - use the paddle attachment if using a stand mixer, or a large spoon if you don't have the mixer (and if you don't, get one - seriously, best piece of kitchen equipment I've ever owned). Mix for about a minute, until the dough forms a ball.

If using the stand mixer, switch to the dough hook and mix for another five minutes, on medium speed (if you have no mixer, now is the time to switch to using your hands and kneading for five minutes instead). Add milk or flour to create a soft, tacky dough - not sticky.

Place the dough in an oiled bowl, cover tightly and refrigerate overnight.

The next day, remove the dough from the fridge about 3 hours before it's time to bake. Once the three hours have passed, divide the dough in two equal pieces and let rest, loosely covered by plastic wrap, for 20 minutes.

Next, place one piece of dough on a floured work surface. Using a rolling pin, roll the dough into a 12-by-15 inch rectangle (30x40cm, roughly). Melt the remaining butter (2 tbsp), and brush it evenly over the dough - you may end up using more than 2 tablespoons for the two pieces of dough. That's fine, just don't put so much butter on the dough that you create pools of the stuff! Whisk together the cinnamon and the remaining sugar (1/2 cup), then evenly sprinkle the mixture over the dough, making sure to leave about 1/2 inch (about 1.5 cm) around the border.

Next, roll the dough lengthwise like a rug, as tightly as possible. Once you have a "log" or "rug" ready, cut 1-inch pieces and place them on a cookie sheet covered with parchment paper. Make sure you leave about an inch of space between each roll, as they will expand greatly while rising and baking. Cover loosely with plastic wrap or a clean kitchen towel, then leave to rise for two hours. Repeat with the other piece of dough.

When you're almost ready to bake, turn the oven to 350 degrees F (175 degrees C). Bake the rolls in the center of the oven for 10 minutes, then turn the pan 180 degrees and bake another 10-15 minutes, or until golden brown and delicious.

In the meantime, make some topping!

Sift 4 cups of powdered sugar into a bowl. Add 1 teaspoon of vanilla extract and 1/2 cup of milk, then whisk until smooth. You may need to add a little more sugar if the glaze is too "watery" (milky?) - it should have the same consistency as pancake batter.

Once the buns are ready, let them cool for about five minutes, then drizzle as much glaze as you want over them. Let cool a little longer before eating, if you can manage. Once the buns are cool, make sure you place them in an airtight container as soon as possible to prevent them from drying out.

Oh, and enjoy them with a glass of milk. It's the only way! (I generally drink coffee with the buns, but that's because coffee is awesome and fantastic and the best.)

14 January 2010

Ciabatta

Look at that picture. That's what I've been trying to achieve since I started baking bread for real, and it's all thanks to Pete Reinhart (and my parents, who got me his book). Yay! A condensed version of the recipe follows:

Ciabatta

22 oz unbleached bread flour (about 4.5 cups)
1 3/4 tsp salt or 2 1/2 tsp coarse kosher salt
1 1/4 tsp instant yeast
2 cups chilled water
1 tbsp olive oil

Combine all ingredients apart from the oil in a stand mixer bowl and run the paddle attachment for 1 minute (alternatively, in a bowl with a large spoon for one minute). Let rest 5 minutes. Add the oil, mix on medium low speed (or by hand - wet your hands first) for 1 minute. Thinly coat a bowl with oil. With wet bowl scraper or wet hands, transfer dough to the bowl. Cover with plastic wrap, rest 10 minutes.

Now stretch and fold four times: oil the work surface. Using wet hands, transfer dough to work surface. Reach under the front end of the dough and stretch it out, then fold it back onto the top of the dough. Repeat with the back, then the sides. The dough should be much firmer now. Flip over and tuck into a ball, then put back in bowl and cover.

After the fourth stretch and fold, cover the bowl tightly and place in the fridge overnight or up to 4 days.

3 hours before you're going to bake, take the bowl out into room temperature. Leave for an hour. Place parchment paper on the back of a sheet pan and dust with flour. Dust the work surface with flour. Once the dough has been out an hour, transfer it to the work surface, being careful not to deflate it too much. Dust the top of the dough with flour, then, with floured hands, coax and pat the dough into a rough square. Cut the dough in half. Gently fold each part into thirds (like folding a letter but without applying pressure). Rest, seam side down, on the parchment paper while doing the second part. Spray oil on the top, then cover loosely with plastic wrap or a clean towel for one hour.

After an hour, with floured hands, lift and cradle each piece and, working form the underside, gently coax it to a length of 7 inches. Lay the pieces back on the parchment paper, seam side up. Spray oil, cover and leave another hour.

When there's 45 minutes left until baking, turn the oven to 550 degrees F (or as high as it will go), with your baking stone and a steam pan in there (steam pan at the bottom, baking stone in the middle). If you don't have a baking stone, you can use the actual sheet pan the dough is on right now. The steam pan could be, for example, a cast iron pan (although you wouldn't want to mess with one that is properly seasoned already).

Once the 45 minutes are up, lower the temperature to 450, put the dough (parchment paper and all) on the baking stone (both loaves) and pour 1 cup of hot water into the sheet pan.

Bake for 12 minutes, then turn and bake another 15-20 minutes, until rich brown crust and bread sounds hollow when tapped on the bottom. The crust will be hard, but soften when cooling. Let cool on wire rack for at least 45 minutes before slicing. Try not to eat the whole thing in one sitting (difficult).

10 January 2010

Swedish Christmas Dinner

Finally! Internet is back, and so am I. Here's what I served a group of friends for Christmas dinner. I will explain what is in the picture and post the recipes below for anything that I actually made.

Starting at the "9 o'clock" position, we have:

  • Aged 2-year old English sharp cheddar cheese
  • Smoked salmon
  • Marinated herring - Abba's is the most famous Swedish maker. Available at IKEA.
  • Swedish limpa bread (recipe below)
  • Swedish meatballs (recipe has been posted previously)
  • Stewed kale (recipe below)
  • Prinskorv ("prince sausage") - found this at IKEA!
  • Jansson's Frestelse ("Jansson's Temptation") (recipe below)
  • Hard boiled egg - recipe below. Just kidding.
The dinner was served with a variety of beverages: red and white wines, glögg, and one of the more important parts of a true Swedish Christmas dinner: akvavit! Before drinking the shot, one has to sing a song in Swedish. Since I know most of my readers are not fluent in the language, here are the lyrics "in English" (basically, someone put English words to the song, to sound like it's in Swedish).

In addition, we made some Christmas-inspired cocktails, one of which is pictured above.

And now, the recipes.

Peppermint "Martini"

3 oz vodka
2 oz white creme de menthe
2 oz white creme de cacao
small candy cane

I hate calling anything that contains anything other than gin and vermouth a "martini," but I guess I have to get with the times. Place all the ingredients in a cocktail shaker with ice. Shake, pour into a cocktail glass, garnish with a candy cane, enjoy.

Swedish Limpa bread

2 1/4 tsp active dry yeast
1/4 cup warm water
1/2 cup packed brown sugar
1/3 cup molasses
1 tbsp shortening or butter
1 tbsp salt
2 tsp caraway seeds
1/2 tsp anise seed
1 1/2 cups hot water
4 1/2 cups AP flour
2 cups rye flour

Place 1/4 cup warm water and yeast in a bowl. Stir to combine and leave for 5 to 10 minutes, until frothy. In the meantime, combine brown sugar, molasses, shortening/butter, salt, caraway seed and anise seed in a large bowl. Pour the hot water over the ingredients in the bowl, stir and set aside until lukewarm (about 5 minutes).

Add a cup of flour to the sugar mixture and beat until smooth. Add the yeast mixture and mix well. Add the rye flour and up to 3 1/2 cups AP flour (which is what remains), but not more than required to make a soft, slightly tacky (but not sticky) dough. You can do this by hand or in a stand mixer with the dough hook attachment. Turn the dough onto a lightly floured work surface and let rest for 10 minutes. Knead until soft and tacky, then form into a ball and place in a large, oiled bowl. Turn to coat. Cover with waxed paper and a towel and let stand in a warm place until doubled (about 2 hours).

Punch the dough down, then pull the edges into the center and turn dough completely over in the bowl. Cover and let rise again until nearly doubled. Punch down again, then turn out onto a floured work surface.

Grease a baking sheet. Divide the dough into two portions and shape into balls. Cover and let rest 10 minutes. Place on the baking sheet, then cover and let rise until nearly doubled. Turn the oven to 375 degrees F. Bake for 25 to 30 minutes or until lightly brown. Cool on wire rack before carving.

Stewed Kale

1 bunch kale
4 tbsp unsalted butter
1 1/2 cups heavy whipping cream
salt
black pepper

Fill a large pot about halfway with water and add about 1 tbsp salt. Bring to a boil. Clean the kale and remove the leaves from the stems. Discard the stems. Blanche the kale in the water for about 1 minute. Drain and let cool. Once cool enough to handle, slice into smaller pieces.

In a medium pot, melt the butter. Add the kale and cook for about a minute. Add the cream, about a teaspoon of salt and some black pepper. Cook over medium heat for about three minutes, stirring regularly. Serve immediately.

Jansson's Frestelse

3-4 large potatoes
1 medium onion
200 g anchovies
1 1/4 cups heavy cream
3 tbsp bread crumbs
2 tbsp butter

Turn the oven to 425 degrees F. Peel the potatoes and onion and cut into thin strips. Grease a 9" dish. Place a layer of potatoes in the pan, then a layer of onion, then finally anchovies. End with a layer of potatoes. Once finished, pour the liquid from the anchovies containers and the cream into the dish. Sprinkle the bread crumbs on top and bake in the oven for one hour, or until the potatoes are soft.

Hard Boiled Eggs

I said I was just kidding. All right, fine: put eggs in pot. Cover with cold water. Bring to a boil over high heat. Once boiling, remove from heat and cover. Leave covered for 15 minutes. Rinse in cold water, peel, eat, enjoy, yada yada yada.

12 October 2009

Mountain of Cookies

I just had to share my mountain of cookies. Now I want one, and I'm all out :(

27 March 2009

Artisan Bread in 5 Minutes a Day


I had read about it for months, I saw the show on TV and one day on the way back home from work, I decided to stop by the Container Store for some baking equipment. That's right, the Container Store! I got me a big plastic box with a lid, took it home, poured some yeast, water and flour in there, stirred it around for a minute and just a day later, I had beautiful, fresh bread. The cost, in dollars? About $0.50. The cost, in time? About 5 minutes. The prize? Let me tell you, not much smells as good as freshly baked bread, and when it took basically no effort and no time, it's almost too good to be true.

The "Artisan Bread in Five Minutes a Day" book by Jeff Hertzberg (an MD...uh) and Zoe Francois is supposedly great. I didn't buy it yet, I might, but for now I'm happy with the basic recipe, which is simpler than simple. Trust me.

You'll definitely need a big bucket, plastic box or...well, something like that. A pizza peel helps. A pizza stone is pretty much essential. Once you have these things, let's get to work.

(Basic) Artisan Bread

1 1/2 tbsp dry yeast
1 1/2 tbsp kosher salt
6 1/2 cups all purpose flour
3 cups lukewarm tap water
cornmeal for dusting

In a large, resealable container, mix the yeast with the lukewarm water (around 100 degrees F is fine). Once mixed together, add the salt and mix again. Next, add the flour. Stir with a wooden spoon, until just combined. Do not knead. Do not over-stir. Do not add anything else. This will be an extremely wet dough, and it's supposed to be! Close the lid and leave to fend for itself (raise) for about 5 hours in normal room temperature.


Now place it in the fridge, and leave at least overnight. The longer you leave it, the more complex the dough will get and the better the bread will taste. Two weeks is max, though, don't leave it longer than that.

Once you're ready to bake, liberally dust a pizza peel with cornmeal. Remove the container from the fridge, and sprinkle the area of dough you intend to use with all purpose flour - you're looking to remove about a grapefruit-sized ball of dough from the container. Dust your hand with flour, grab the dough and pull. Use a serrated knife to cut the dough loose. Next, shape a ball in your hand - you're looking to gently stretch the dough. Do not knead it! Stretch, turn a 1/4, stretch again. Repeat until you have a smooth ball. If it's very wet, use more flour to dust, but the flour is not supposed to be incorporated into the actual dough, just cover the surface.


Let the dough rest on the pizza peel for about 1h30m. They say 45 minutes in the book, I believe, but I find waiting twice that length of time is better. When 40 minutes remain, place the pizza stone in the middle of the oven, something that can contain water and won't break in the bottom of the oven (a cast iron pan or a broiler pan works fine), then turn your oven to 450 degrees. Once the 1h30 is up, slash the top of the bread three times with a serrated knife, to prevent exploding bread in your oven. Transfer to the pizza stone. Pour about a cup of warm tap water into a glass and quickly add to the pan at the bottom of the oven, then close the door and leave it closed - the steam will help develop a much better crust.

Bake for 20 minutes or until golden brown. Remove from the oven and let cool on a cooling rack for at least 30 minutes before cutting into it and probably eating the whole thing in one sitting!

You don't have to wash the container when you run out of dough - just start anew and the small pieces of old dough will help develop a more complex taste for the next batch. Not quite like a sourdough starter, but not far off.

10 March 2009

Bagels


Had I known bagels would be so easy to make, I would have attempted this way earlier. The process is like creating any kind of bread, really, with the added step of placing the uncooked bagels in boiling water for a few minutes. This is what creates the harder crust and the spongy interior, which makes bagels so good, so good.

Bagels

3.5 cups all purpose flour
1.25 cups lukewarm water
1 tsp instant yeast
2 tbsp sugar
2 tsp salt

I make this in a stand mixer - if you're kneading by hand, make sure you have some good music, good company, good drinks or all three combined to make time fly by. Start by mixing the yeast and the sugar with the water - the water should be warm, but not hot. We're looking to awaken the yeast, not burn it to death. Once the yeast and sugar has dissolved completely, pour the flour into a large bowl (the stand mixer bowl, if using) and make a well in the middle. Add the liquid and incorporate some of the flour into it. We're looking to make a very loose batter, not an actual dough at this point.

Let this rest for 30 minutes - you'll notice that it gets very bubbly on top. Once the 30 minutes are up, add the salt and start kneading. If you're using the stand mixer, lube your dough hook up with cooking spray and knead for about 15 minutes. If doing by hand, mix everything up in the bowl and turn on to a floured working space. Knead for 30 minutes, without breaks! Breaks are for the weak. Oh, I'm just kidding.

Once the kneading is done, you should be able to "windowpane" the dough. Take a small piece and flatten it into a disc. Drag the edges, turning with each pull, and the center of the dough should be like a membrane, you should easily be able to see light through it. Here's an example of what that looks like.

Optional step: If you wish to make bagels with something in them, like cranberries or blueberries, now is the time to gently fold them into the dough.

Place the dough back in the bowl (or leave it in the bowl if you're using a stand mixer), cover loosely and let rise for about 1 hour or until doubled in size. Once done rising, turn the dough back out on the floured work surface and divide it into 8 equally large parts. Now it's time to form bagels - either make a lump and poke a hole in the middle, or roll the lump out into a roll and join the ends together. Either way works. Place the bagels on a baking sheet and cover again.

Turn the oven to 400 degrees F. Put water, a large pinch of salt and a large pinch of sugar in a large pot and place over high heat on the stove, until you achieve a rolling boil. Once the water is boiling, your bagels should have risen enough - you're looking to have them increase about 50% in size. Now put as many bagels as you can fit in one layer in the boiling water. Leave for one minute, then flip them over and leave for another minute. Place back on the sheet and repeat this step until they are all nice and cooked.

Optional step: at this point, you can top the bagels with whatever you see fit. Grated cheese works well, coarse sea salt is awesome (make sure you push the salt into the bagel lightly, don't squeeze all the air out of it!) and a mix of red onion and cheese is great too. Sesame seeds, poppy seeds, hell, maybe I should try something sweet on there at some point too.

Bake the bagels in the oven for 20-25 minutes or until golden brown. If you're a thermometer lover, they need to be about 210 degrees F on the inside to be done.

Let rest on a baking rack for at least 10 minutes. They freeze exceptionally well - I generally thaw on "3" in the microwave for 1 minute and the toast them in a normal toaster. If not frozen, they won't last 24 hours - share 'em (with me)!

23 February 2009

More Cookies

I made cookies recently, and decided to try again but with a slight variation. Instead of dark chocolate chip cookies, I made them with white chocolate chips and macadamia nuts. I decided to mix up some cocoa in the batter to give them some color instead of having light cookies with white dots of chocolate and nuts in them. Turned out great. Follow the previous recipe, but replace the chocolate chips with white chocolate chips, add about 1/3 cup macadamia nuts (crush lightly, we don't want huge chunks) and add 1/2 cup of baker's cocoa to the batter. Yum yum.

05 February 2009

Chocolate Chip Cookies


Cookies rock. Chocolate chip cookies doubly so. That is all.

Chocolate Chip Cookies

2 cups minus 2 tbsp cake flour (8 1/2 oz by weight)
1 2/3 cups bread flour (8 1/2 oz)
1 1/4 tsp baking soda
1 1/2 tsp baking powder
1 1/2 tsp coarse salt - kosher salt or sea salt, preferably
2 1/2 sticks (1 1/4 cups) unsalted butter
1 1/4 cups light brown sugar
1 1/8 cups (8 oz) granulated sugar
2 eggs
2 tsp vanilla extract
1 1/4 lb bittersweet chocolate disks/chips
sea salt

Start by sifting together the flours, baking powder, baking soda and salt into a bowl. Next, cream together the butter and sugars. You'll need to use an electric mixer at the very least - a stand mixer with the paddle attachment is your best bet. Cream for about 5 minutes until very light. Add the eggs, one by one, and incorporate fully before adding the next. Stir in the vanilla (I like cookies with some extra vanilla so I used a little more than the 2 tsp listed).

Next, mix in the flour. Do it in batches to save your kitchen from a cloud of flour, but be quick, as you don't want to mix this too much either. Once incorporated (5 to 10 seconds after adding the last batch), stop mixing. Add the chocolate chips, carefully so you don't break them too much. I did it with the stand mixer on the lowest setting, and everything was mixed up within a few minutes.

Cover the dough in cling film (in multiple sections, if desired) and refrigerate for at least 24 hours, preferably 36. You can leave the unbaked dough in the fridge for up to 72 hours.

When ready to bake, set oven to 350 degrees F and remove the dough from the fridge. Line a cookie sheet with parchment paper (or grease it, but the paper is preferred). Scoop out the cookies. They should be roughly the size of golf balls and then some. If you don't play golf or have never seen a golf ball up close, they should be round and roughly 1 inch in diameter, maybe a little bit more.

Place the cookie dough balls on the cookie sheet, making sure to leave at least an inch between each cookie. A standard size sheet should hold roughly 12 - 14 cookies. If you wish, lightly sprinkle the cookies with sea salt at this time (I did, and it's delicious).

Bake in the middle of the oven until lightly brown but still soft. In my oven, it took pretty much exactly 18 minutes, but when they're ready depends on a lot of factors (your oven, the size of your dough balls, your altitude, whether or not you shaved today) so keep a close eye on them once you've passed the 15 minute mark.

Remove from the oven, leave the cookie sheet for five minutes and then transfer the cookies to a cooling rack. I use a spatula - for now, the cookies will be extremely tender and will collapse if you poke around them too much. Let cool for at least 10 minutes before biting into them.

If there's dough left, repeat the process to create more cookies.

If there are cookies left when they've cooled down completely, store in airtight containers. They will last a week or so, and they should stay nice and chewy for about 2-3 days, maybe even more if you're lucky.

If you wish, replace the chocolate chips with white chocolate chips and maybe a few macadamia nuts. Yum.

16 January 2009

Apple Crumble


I am fully aware that I posted a recipe for apple marzipan pie just a week ago or so, but I made an apple crumble the other day and it's very different from the pie so I decided to post the recipe. Now, a crumble is very hard to mess up and it's quick to prepare. Just make sure you have some vanilla ice cream or custard to serve it with, as that will double the deliciousness.

Apple Crumble

3-4 apples (use a variety, if possible)
1 stick very cold butter (8 tbsp, 125g)
1 1/4 cups all-purpose flour
1/2 cups white sugar + a few pinches
ground cinnamon

Turn your oven to 425 degrees F (225 degrees C).

Start with the apples. Peel, remove the seeds and slice. A normal sized apple should make roughly 10-12 slices. The size isn't of a huge importance, and you can really dice them or cut them into little shapes that are vaguely reminiscent of Disney characters. It does not matter. I slice, because slicing is fun.

Next, grease a 9 inch form. You can use a pie form for this, or a square dish - as long as it's oven safe. I use butter, a little bit of vegetable oil would be OK too. Place the apples in the pan, coat with a few pinches of sugar and cinnamon.

Place the flour and sugar in a bowl. Add the chilled butter in small chunks and start crumbling with your fingers. Your goal is to get pea-sized grains of dough, but be sure not to over-work it. You're not looking to melt the butter and form a ball of dough here, we want crumbles. Once combined, drizzle the mixture over the apples. You don't have to completely cover everything, but you should be able to.

Place in the center of the oven for 30 minutes. Let cool slightly, but serve while still warm with some vanilla ice cream or cold custard to make it even better.